Creating A Tournament
Creating a tournament on Squabbit is super easy and you can do it in just a few minutes. In this tutorial we’ll cover some of the most commonly used features when setting up a tournament.
Step 1: Create the tournament
To create the tournament, tap the green + button on the Tournament tab -> Create new tournament
Step 2: Choose the number of tournament rounds
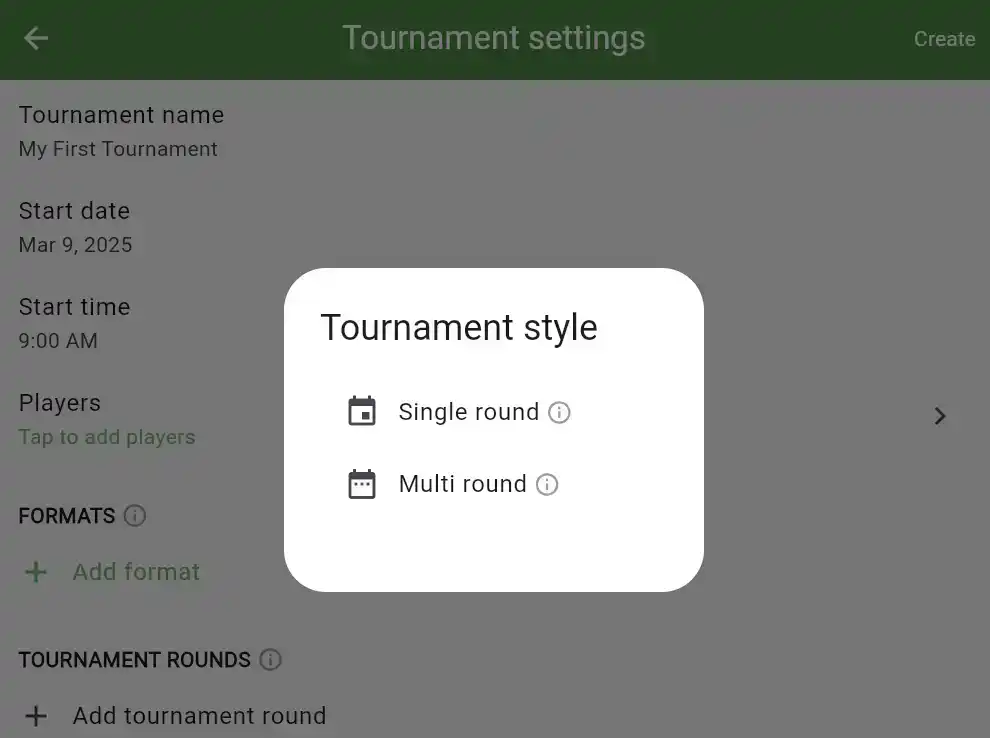
After entering the tournament name, you will be asked if this is a Single round tournament or Multi round tournament.
A single round tournament is where only one round is played. A multi round tournament is played over multiple rounds. For example PGA events are multi round tournaments because they are played over 4 days. Regardless of what you choose, you can always change this later and add or remove tournament rounds. In this example we will choose a multi round tournament with 2 rounds.
Step 3: Choose the course(s) and tees
Next you’ll be prompted to choose the course or courses you will be playing at. If you are playing a multi round tournament you can choose a different course for each round.
After choosing the course, you’ll then have the option to choose the tees that are available. If everyone is playing from the same tee then you can just select a single tee. If players are playing from different tees then select all the tees that will be used.
Step 4: Add players (optional)
Next up is adding all the players to your tournament. This is an optional step so you can skip this and do it later if you’re not sure who is playing yet or if you want to allow players to self register for your tournament.
To begin, first tap the Players row to start adding players to your tournament.
Then tap the green + button to start adding players.
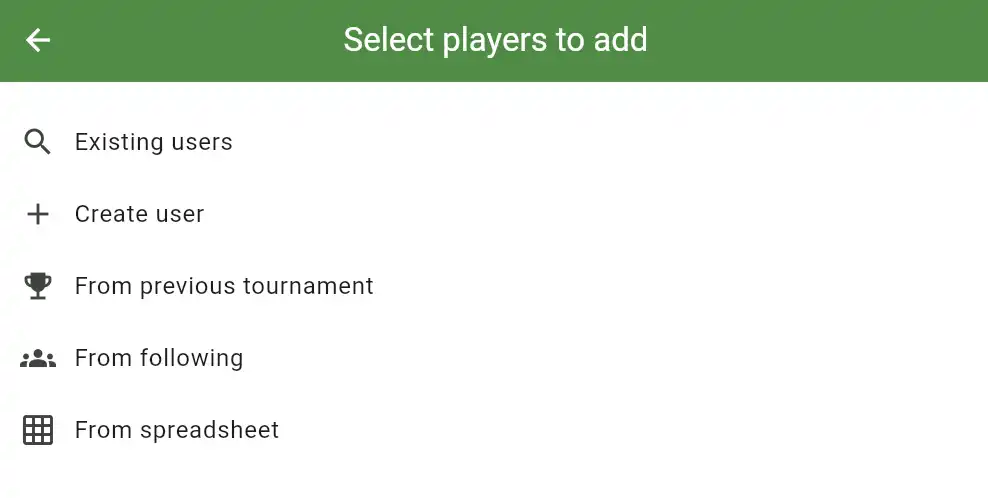
Next, you’ll be given several options to add players.
Existing users: Use this if you want to add players to your tournament that already have accounts on Squabbit.
Create user: Use this if you want to add a new user to Squabbit. After you create a new user, you can invite that player to sign up on Squabbit so that they can enter scores themselves and see the live leaderboards. This is covered in more detail in the Inviting players to your tournament tutorial.
From previous tournament: This allows you to quickly select players that played in a previous tournament.
From spreadsheet: This allows you to quickly import players from a spreadsheet.
Tip: By default players can edit scores for everyone in their tee time. So you only need one person per group to sign up and do the scorekeeping for their group. Also admins can enter scores for anyone in the tournament, so you can also enter the scores yourself if players want to use paper scorecards.
After you’ve added players, you will be brought to the Players screen.
From here you can make many adjustments to the players including making them an admin (tap on the Role column), changing their nickname (tap on their name), add walking or riding preference, change their tee, add a GHIN or WHS account and many more. Once you’re done, tap the back button to continue to the tournament setup.
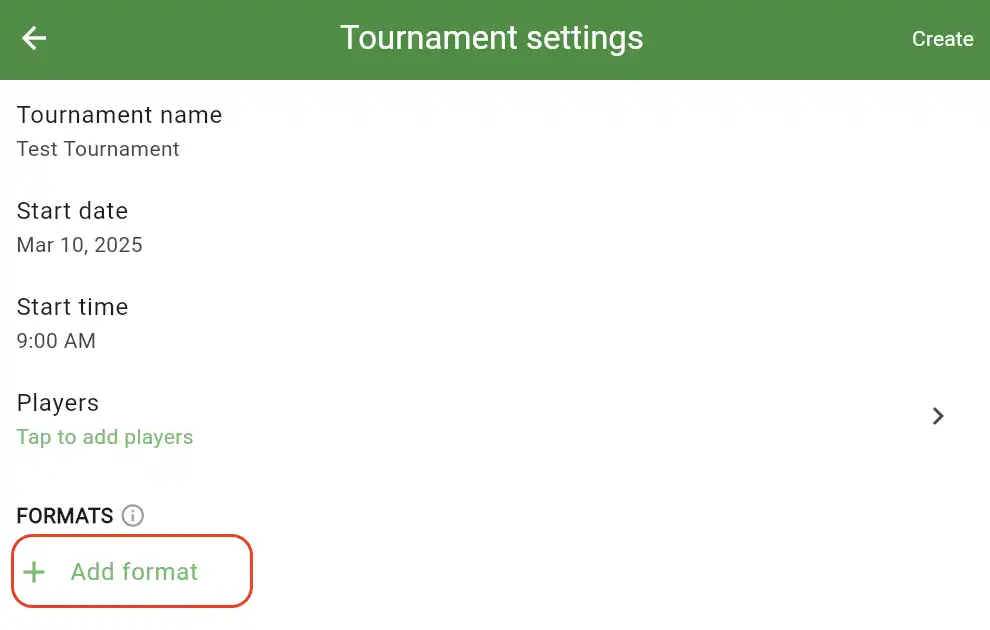
Step 5: Add your tournament formats
Tournament formats determine what games you will be playing and what leaderboards will be displayed. There are more than 30 different formats to choose from, including popular formats like Strokeplay, Ryder Cup, Skins, Stableford and Scramble.
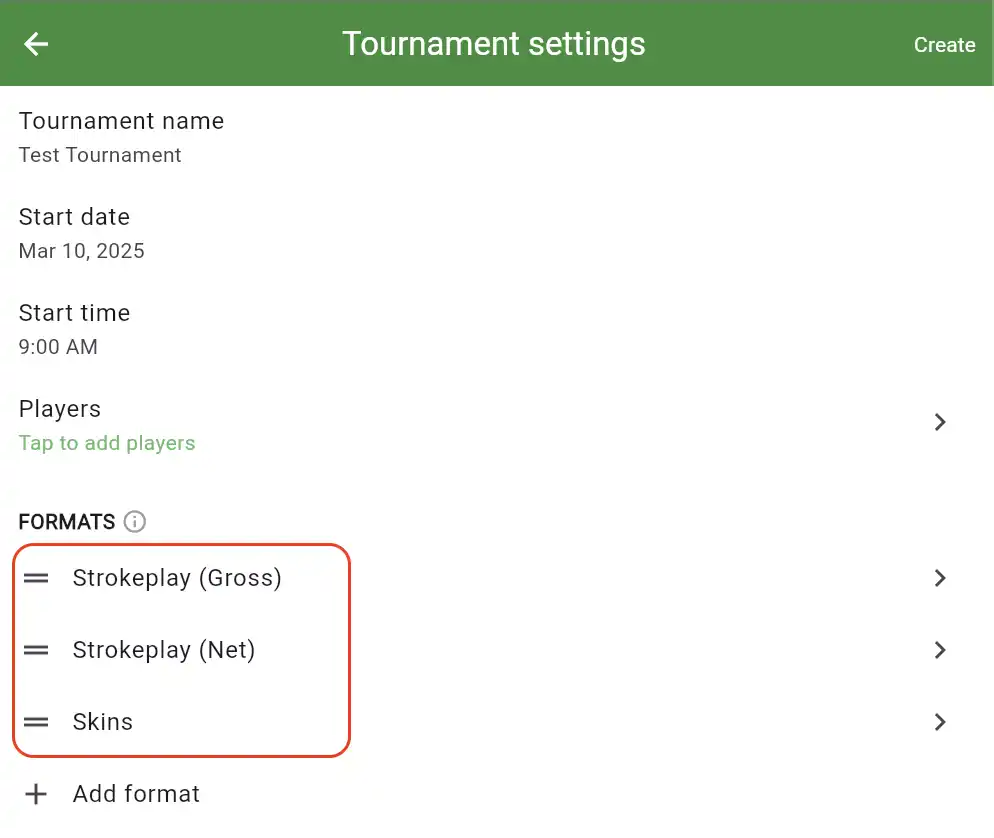
You can add as many formats to your tournament as you want and you can even add the same format more than once. For example if you want to have a net and gross Strokeplay leaderboard, you would add two Strokeplay formats, one with handicaps enabled and one with handicaps disabled.
In this example we’ve added a gross and net Strokeplay format as well as a Skins format.
Step 6: Finish creating your tournament
Finally, tap the create button to finish creating your tournament!
Exploring your tournament
After you finish creating your tournament, you’ll be brought to the tournament home screen with four tabs along the top. In the following sections we’ll explore each tab and what its role is.
Note that on every tab you can always access the tournament settings and invite code from the top toolbar.
The Home Tab
The home tab is the first screen that other users will see when you share the tournament link or invite code with them. On this screen you can perform several actions including changing the cover photo and updating the group description.
The Leaderboard Tab
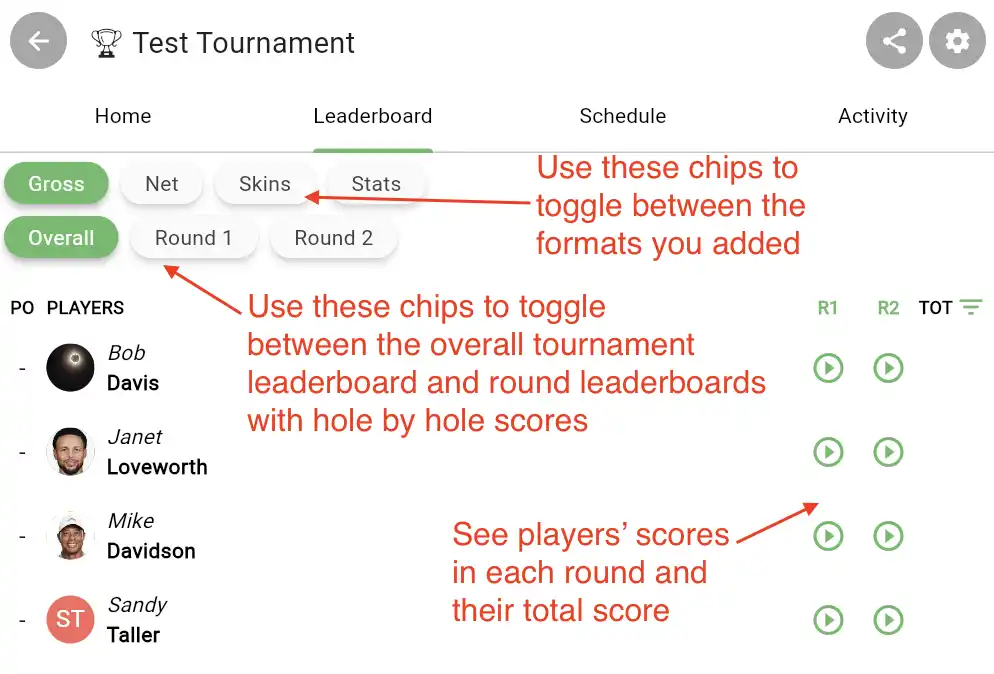
The leaderboard tab lets each player see real time updates to everyone’s scores. You can switch between leaderboards for each format you added and even see hole by hole scores for each round in the tournament.
Tip: Players can tap the green arrow beside their name to start their round and see their scorecard.
The Schedule Tab
The schedule tab is where you can set up all of the tee times and matches that will be played in each round. Other players can see what time they’re teeing off and even choose their own tee time if you’ve enabled it.
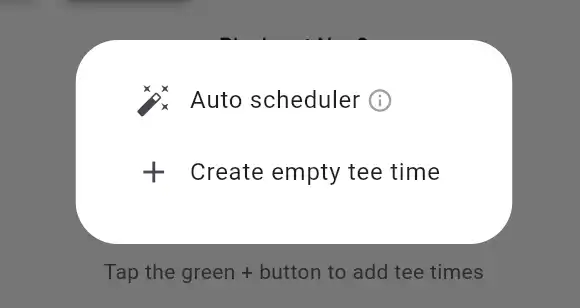
When tapping the green + button, you’ll be given the option to use the Auto Scheduler or manually create a tee time. The Auto Scheduler is a powerful tool that can quickly setup tee times and matches based on your selected criteria, like Round Robin, Smart Shuffle, Similar Handicaps and more.
Once you have created the tee times, players can tap the Start Round button on their tee time to view the scorecard and enter scores for their group. By default players can add scores for anyone in their group, so you only need one player to download the app to keep track of scores.
You can tap on the starting hole or time to change it for each scorecard. You can also choose whether it is a shotgun tournament or adjust the interval between tee times in the tournament settings.
The Scorecard
When a player taps Start Round, either from the leaderboard or the Schedule tab, they will be brought to their scorecard.
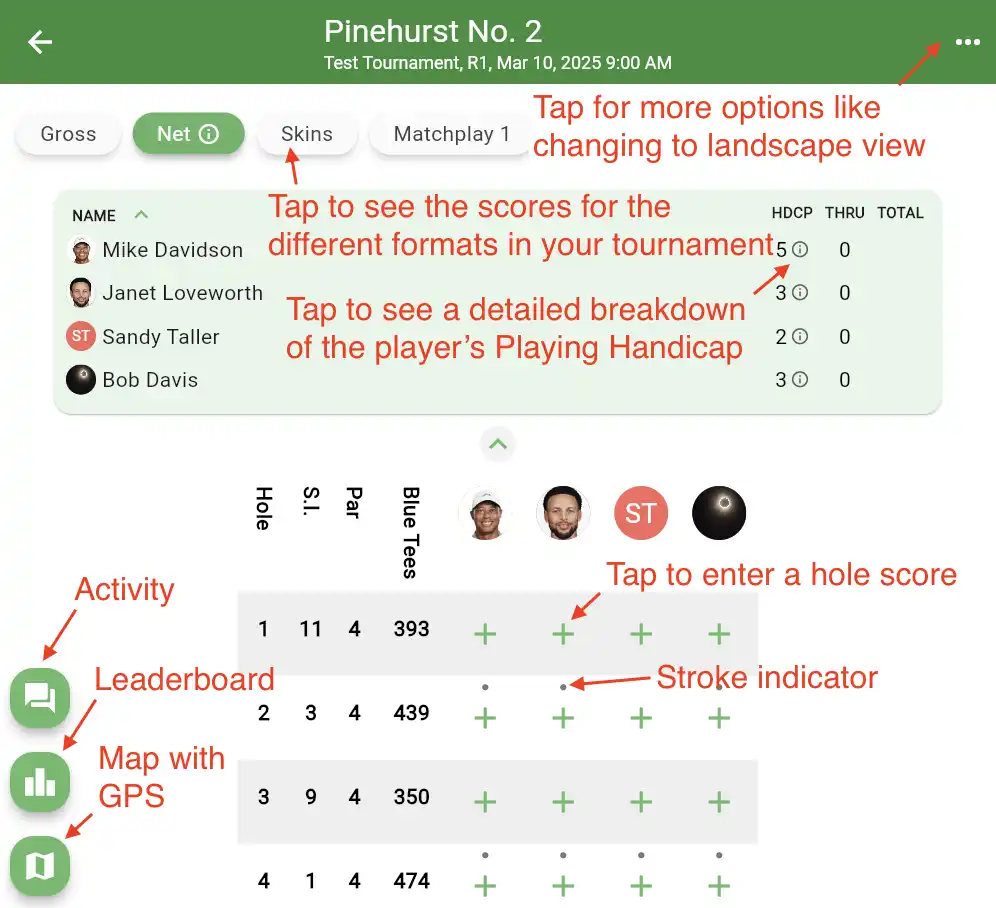
From the scorecard, just tap a green + sign to enter a hole score for the corresponding player. After entering a hole score for a player, you will automatically be prompted to enter the same hole score for the next player on the scorecard. You can change the auto advance functionality by tapping the 3 dots in the top right.
At the top of the scorecard, you will see chips corresponding to each format you’ve added to your tournament. When you tap on a format, you will see the hole scores for each player. For this example, since we added net and gross Strokeplay formats, you will see the gross scores when gross is selected and net scores when net is selected.
When a format that uses handicaps is selected, you will see the Playing Handicap for each player in the summary at the top below the format chips. If you tap the info icon beside a player’s handicap, you will see a detailed breakdown of exactly how that player’s Playing Handicap was calculated. This includes things like course handicap calculation. To read more about the different handicapping options in Squabbit see the How Handicaps Work in Squabbit article.
The Activity Tab
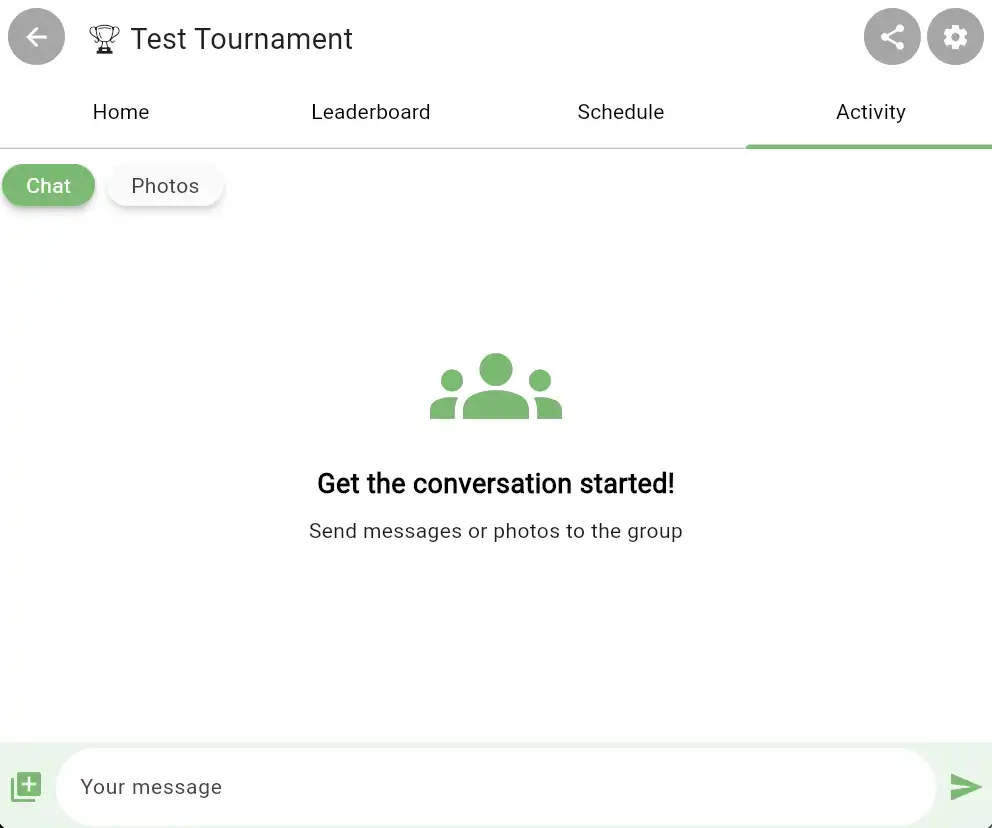
The activity tab is the lifeline of your tournament. You can use it to send messages to everyone in your tournament, upload photos and see all the notifications for your tournament like when the first place on the leaderboard changes or someone birdies a hole.
Tip: As the admin, you can delete any message in the activity tab sent by you or anyone else by long pressing on it.
Tip: You can configure what notifications are active for your tournament in the tournament settings.
Start Exploring!
That covers the basics of creating a tournament and is everything you need to know to get up and running. If you are trying to do something more custom than what was covered here, feel free to explore all the different options in the app. You can enter test scores to see how things work and there are info icons ⓘ in most places in the app that can help explain what each feature does. You can even change the tournament settings or add formats after entering scores and the leaderboard will update instantly.
If you get stuck or want to request a new feature that isn’t in the app, use the Help menu in the app.
Enjoy!

