Registration Tiers
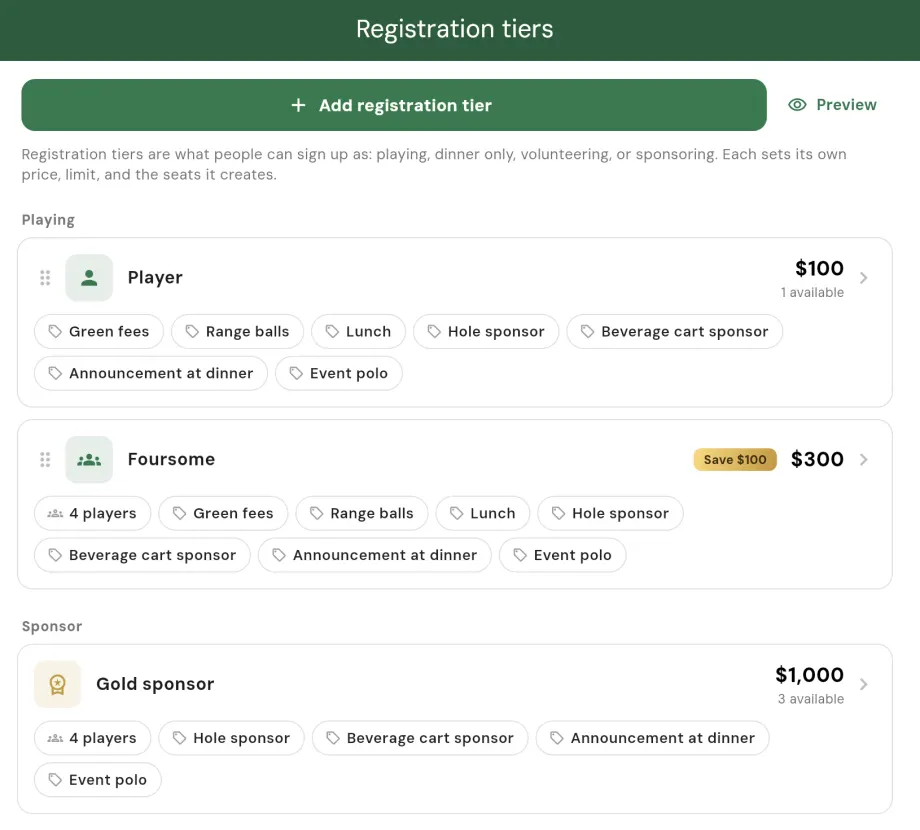
Registration tiers are what people can sign up as. One event might let folks register as a single player, grab a whole foursome, buy a dinner-only ticket, volunteer for the day, or sponsor a hole. Each tier sets its own price, its own questions, its own optional add-ons, and its own limit, so a single registration flow handles everyone who shows up to your outing, not just the golfers.
This guide covers setting up tiers, pricing them, collecting the right details for each one, offering discounts and early-bird rates, letting people register as a group or a team, adding non-playing registrants like sponsors and volunteers, capping the field with a waitlist, and choosing how your group collects money.
Where tiers live
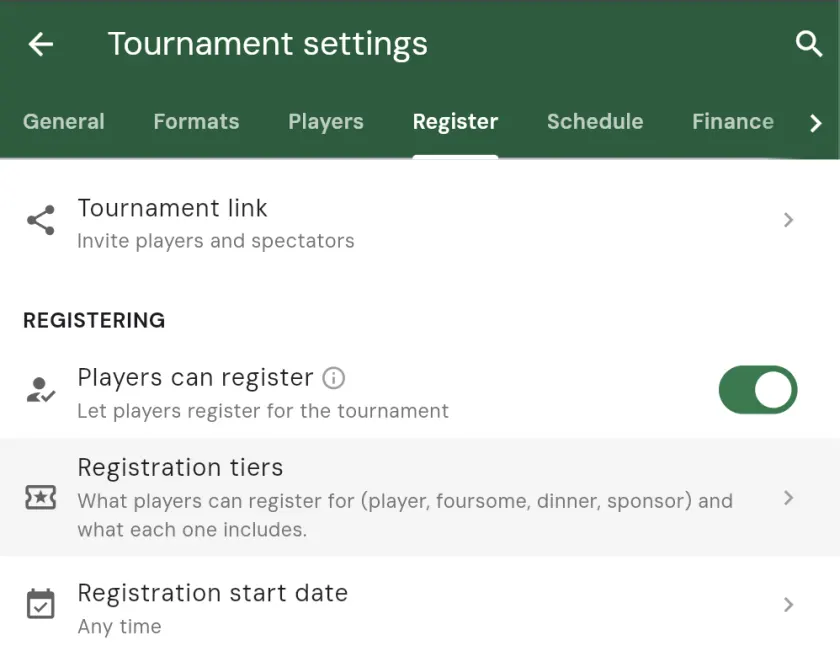
Open your tournament settings with the gear icon and go to the tab. Turn on self-registration, then find the Registration tiers row. Tapping it opens the tier catalog, which lists every tier in the order people will see them. From there you can tap Add tier to create one, tap an existing tier to edit it, or drag tiers to reorder them.
You don’t have to build anything to get started. The moment you enable self-registration, Squabbit gives you one real tier to work from, so a simple event just works. By default that tier is an “Individual or group” tier (anyone can register themselves, or register a few players at once), but you can rename it, reprice it, or replace it entirely.
Adding a tier
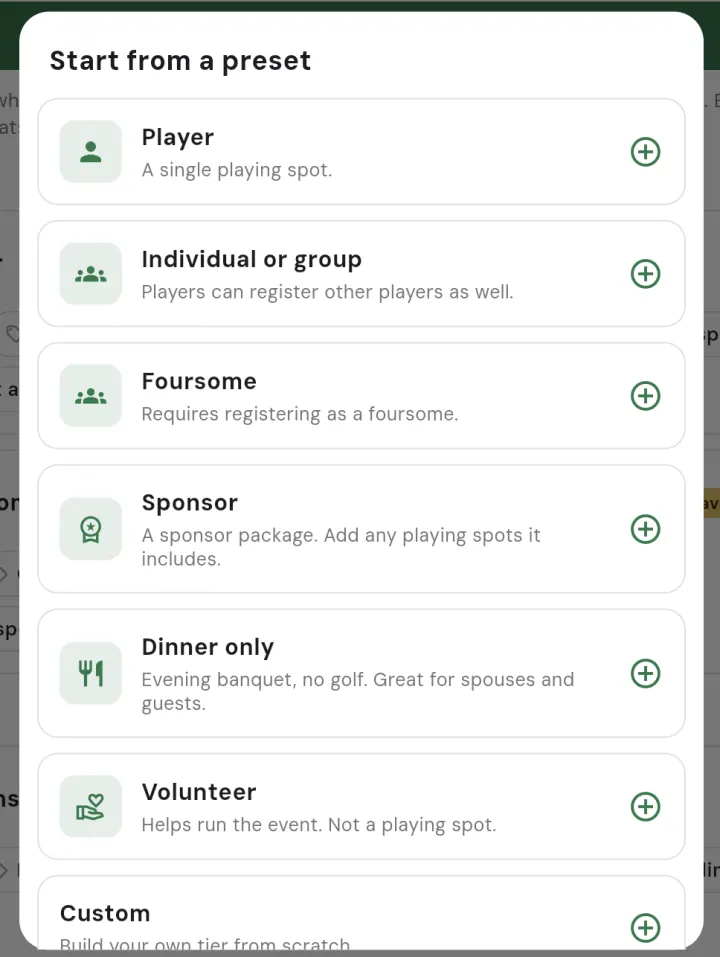
When you tap Add tier, Squabbit offers a few presets so you don’t start from a blank page:
- Player: a single playing spot.
- Individual or group: a playing tier where the person registering can add other players too.
- Foursome: a playing tier that must be registered as a group of four.
- Sponsor: a sponsor package. Add any playing spots it includes, like a sponsored foursome. (A Pro feature.)
- Dinner only: an evening banquet seat with no golf, great for spouses and guests.
- Volunteer: a helper for the day, not a playing spot.
- Custom: build your own tier from scratch.
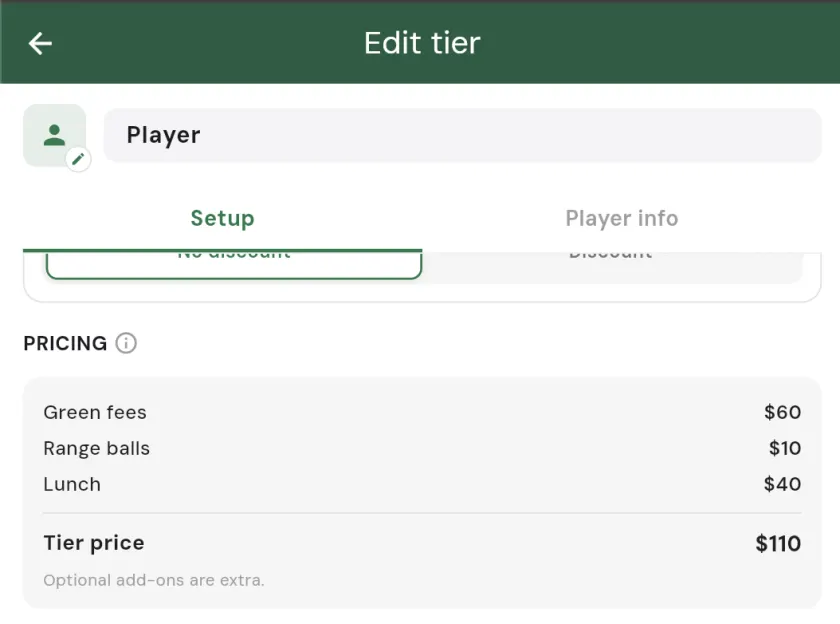
Pick one and you land in the tier editor, which has two sections: Setup (its name, type, price, limit, what’s included, and add-ons) and Player info (the questions that tier answers at registration). A sponsor tier also gets a Sponsor section for the questions a sponsor fills in.
Tier type: who is this for?
Every tier has a Type, which decides how its spots behave. Squabbit offers four:
- Playing: a golfer. Playing spots show up on the leaderboard and count against your field capacity.
- Not playing: someone attending but not golfing, like a dinner guest or a spouse. They don’t appear on the leaderboard and don’t take a playing spot.
- Volunteer: a helper for the day. Like non-playing registrants, they stay off the leaderboard and off the playing field.
- Sponsor: a sponsor package. A sponsor tier can bundle in playing spots (a sponsored foursome, say) and collects the sponsor’s logo and company details.
You can also give each tier its own icon and accent color so the catalog is easy to scan: for example a gold sponsor tier that stands out from the playing tiers.
Pricing a tier
A tier’s price has two parts that add together:
- Tier price: a flat amount you set directly, charged once per registration. This is the simplest way to put a number on a tier (for example, a $40 dinner ticket).
- Included fees and purses: any required fees or game buy-ins the tier covers. A tier automatically includes everything that applies to its type, and you turn off the ones that don’t belong.
Added together, these make up what a registrant pays to join on that tier. On the Setup section you’ll see a Pricing summary and a live preview of exactly what that registrant’s receipt will look like.
What’s included vs. add-ons
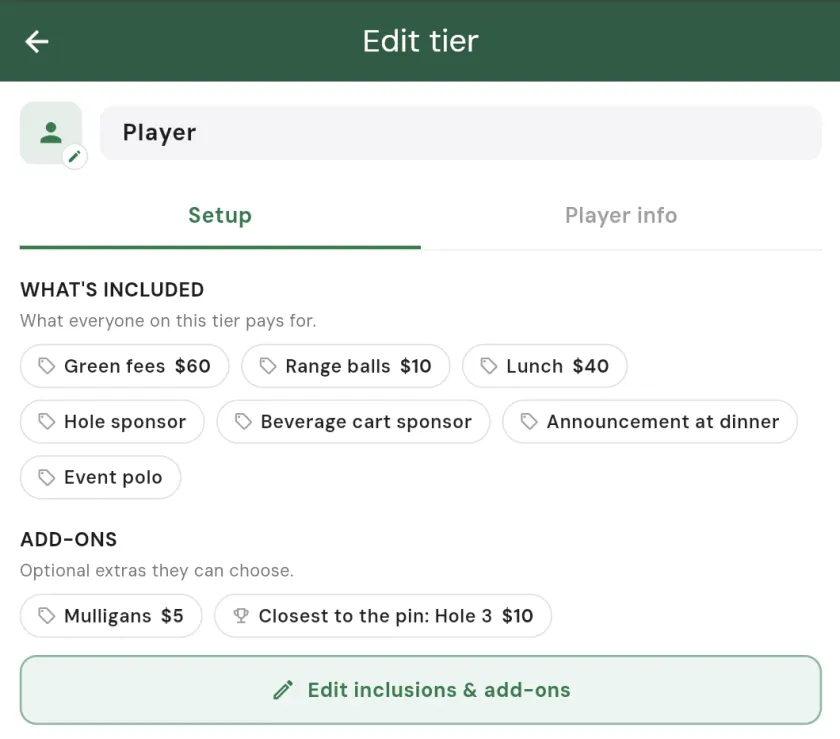
Inside the tier editor you control two separate lists:
- What’s included: the fees and purses everyone on this tier pays for as part of the price. A green-fee-and-cart tier, for instance, bakes those in.
- Add-ons: optional extras a registrant can choose during signup, like a mulligan pack, a raffle ticket, or an extra side game. Add-ons are priced separately and layered on top of the base price only if the player opts in.
Because inclusions are computed from the fees and purses on your event, anything you add to the tournament later is automatically available to tiers: you just decide per tier whether it’s baked in, offered as an add-on, or left off.
Discounts and early-bird rates
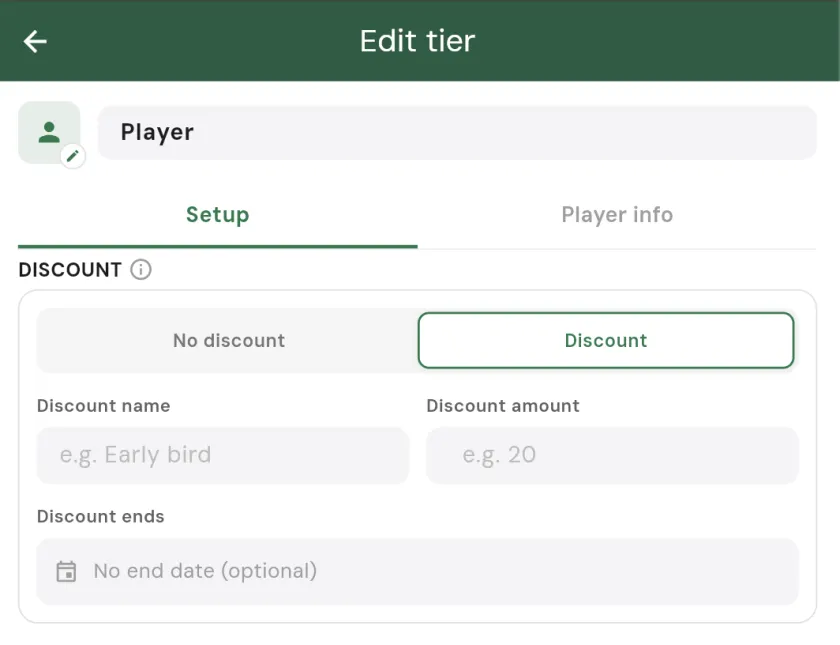
Each tier can carry one discount: a flat amount knocked off the tier price, applied once per registration. On the tier’s Setup section, switch Discount on and set:
- A discount name (for example “Early bird” or “Member rate”), which shows on the tier and on the registrant’s receipt.
- A discount amount taken off the price.
- An optional end date. Add one and the discount becomes an early-bird rate that expires on its own: after that date the tier quietly shows its full price again.
The savings appear as a promo tag on the tier (for example “Save $20”) and as a credit line on each buyer’s receipt.
Individual vs. group or team registration
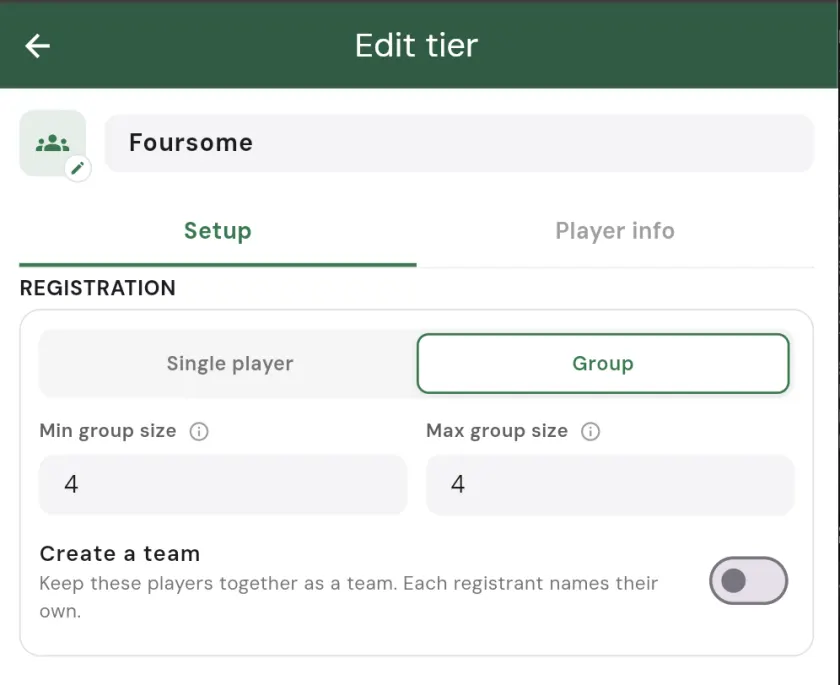
A playing tier can be registered one of two ways, chosen in the editor’s Registration section:
- Single player: one purchase is one golfer.
- Group: the person registering can add more players in one go. You set a minimum and maximum group size, so a “Foursome” tier can be fixed at four, or an open group tier can let someone bring anywhere from one to a handful of players.
If your event uses a team format, a group tier can also create a team: flip that switch and each registration keeps its players together as one team, which the registrant names when they sign up. (The toggle only works once the event actually has a team format.)
Non-playing registrants: dinner guests, volunteers, and sponsors
Not everyone at an outing swings a club. Tiers let you register the rest of them cleanly:
- Dinner or guest tickets: create a Not playing tier (for example “Dinner only”) with its own price. These registrants are counted and billed, but never clutter the leaderboard or take a playing spot.
- Volunteers: a Volunteer tier captures helpers and the details you need from them, again without touching the field.
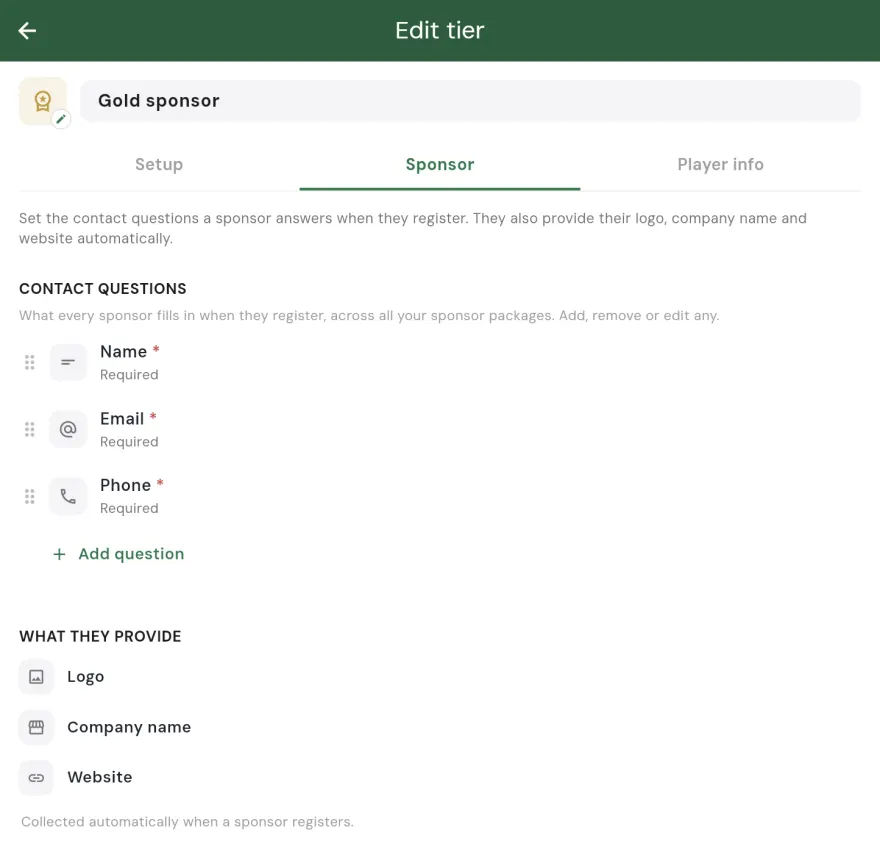
- Sponsors: a Sponsor tier sells a sponsorship package. On its Sponsor section you choose the questions a sponsor answers (on top of their logo, company, and website), and the package can bundle in playing spots if it comes with a foursome.
Tier-specific questions
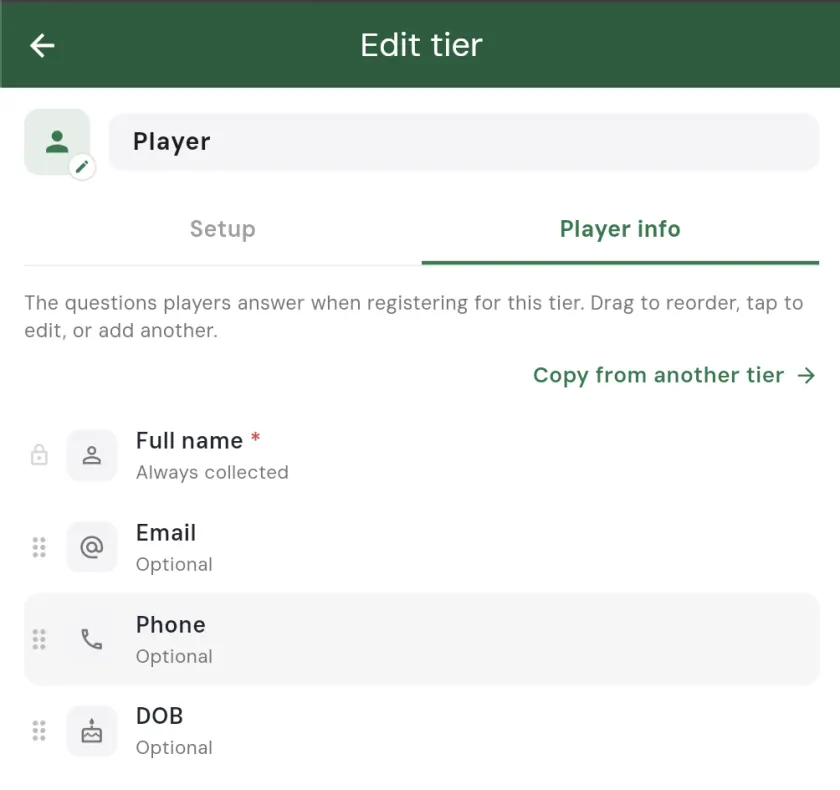
Every tier has its own Player info section: the questions someone answers when they register for that tier. The player’s name is always asked; beyond that you drag questions to reorder them, tap one to edit it, and add built-in questions (email, phone, handicap, shirt size, and the like) or create your own custom questions.
Because questions are per tier, a volunteer isn’t asked for a handicap and a dinner guest isn’t asked for a tee preference. If two tiers should ask the same things, use Copy from another tier at the top of the section to match one tier’s questions to another in a single tap.
Limits, field caps, and the waitlist
There are two separate ways to cap registrations:
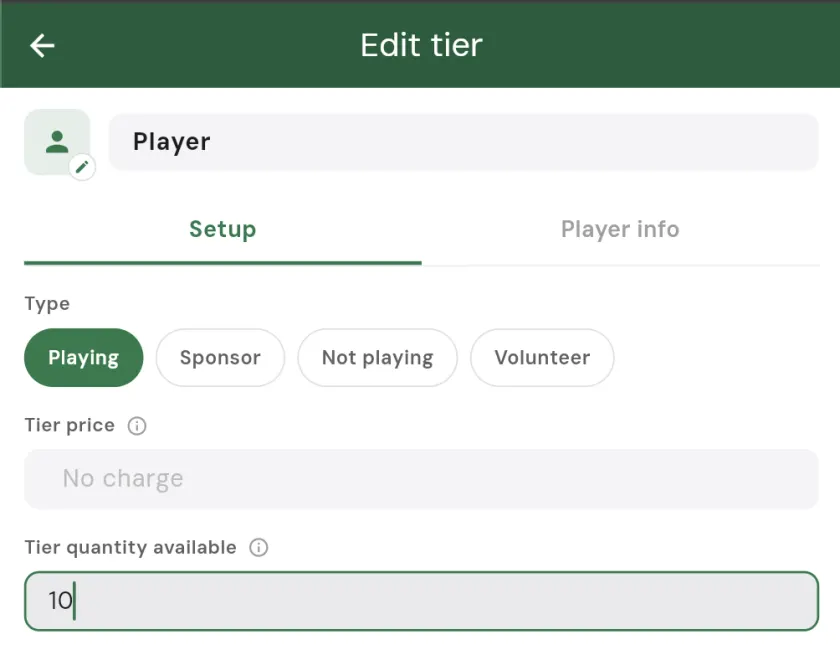
- Per-tier quantity: in the tier editor, set Tier quantity available to limit how many of that specific tier you’ll sell (for example, only 20 sponsor packages). When a tier sells out, it’s marked sold out and no longer bookable. Leave it blank for no limit.
- Field capacity: a cap on the number of playing spots for the whole event. Only playing seats count against it, so dinner guests, volunteers, and sponsors never use up a golfing spot.
Once the playing field is full, additional golfers can join the waitlist instead of registering. If a spot opens up (someone unregisters, or you raise the cap), Squabbit can automatically promote the next person off the waitlist and notify them. You can also keep the waitlist visible to members so everyone can see where they stand.
What your registrants see
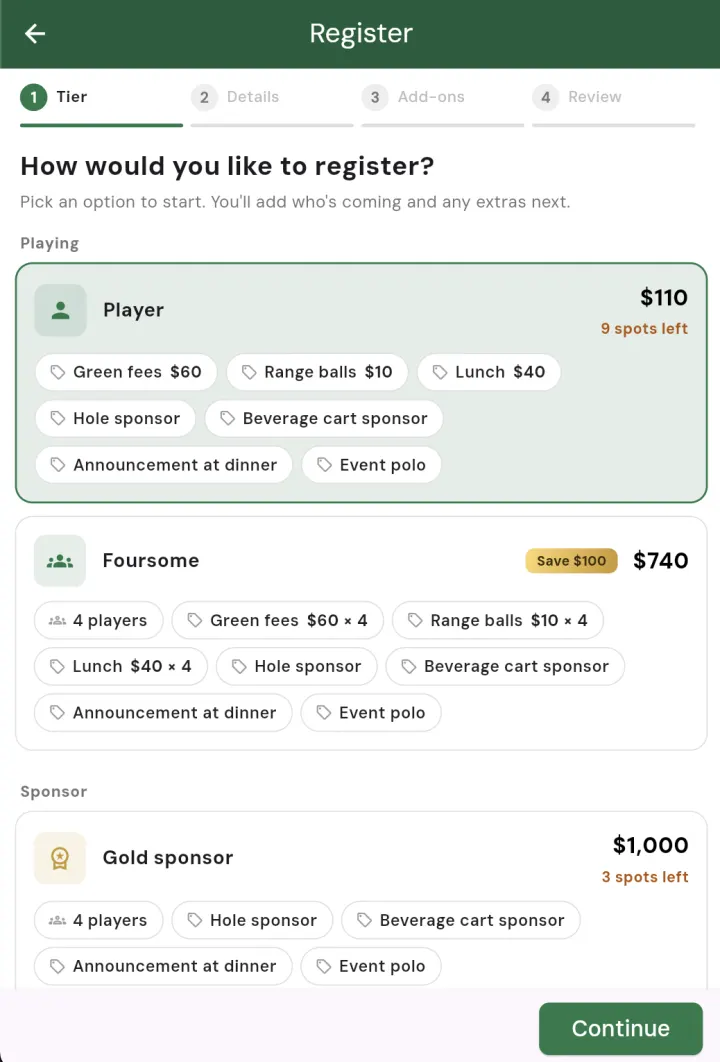
When someone opens your registration link, they pick a tier from a simple list of cards: each shows the tier’s name, price (and any savings), and what it includes. They tap the one that fits, answer that tier’s questions, choose any add-ons, and pay. A group or foursome tier lets them add their playing partners in the same flow.
Choosing how your group collects money
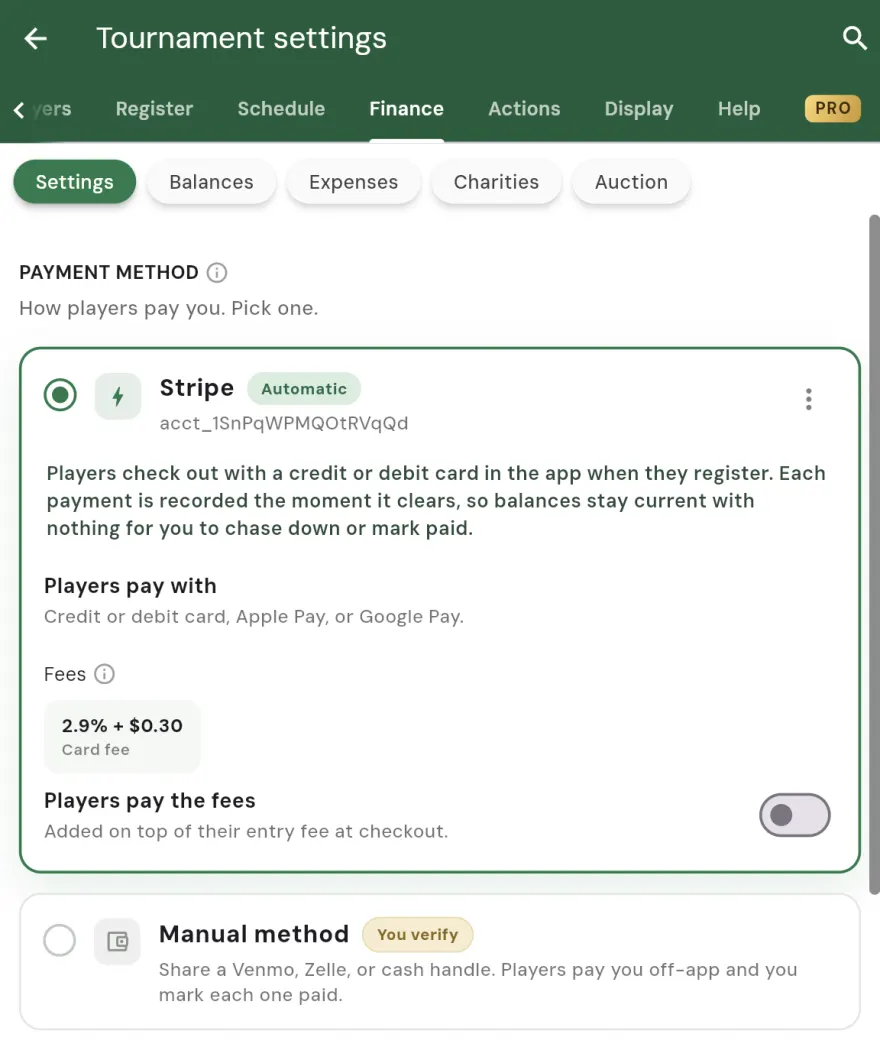
If any of your tiers charge money, you need a way to collect it. A group has one payment method, set on the tab’s Settings chip under Payment options. There are two kinds:
- Automatic (credit card via Stripe): players pay by card and Squabbit confirms the payment automatically. Their balance updates instantly with no manual step. Setting this up connects (or reuses) your Stripe account.
- Manual verification: a handle for paying outside the app, like Venmo, Zelle, PayPal, or a custom method. Squabbit can’t see the money move, so whoever gets paid confirms they received it before a balance updates.
With a method in place you can turn on Require payment to register so a tier’s fee must be paid before the registration completes. For the full money picture (receipts, expenses, payouts, and settling up) see Collecting Fees and Settling Up.
That’s it!
Build a tier for each kind of person at your event, price it, choose the questions and add-ons it needs, and set a limit if it should sell out. Add a discount for early birds, let groups or teams register together, and pick how your group takes payment. Squabbit runs everyone through one clean signup flow and keeps every receipt straight. If you get stuck or want to suggest an improvement, use the Help menu in the app.